OcuTrace
Webcam-based saccade & antisaccade analysis for neurological research — an affordable, open-source alternative to commercial eye trackers.
OcuTrace is an early-stage research tool. It is NOT a CE-marked or FDA-cleared medical device, NOT validated for clinical diagnosis, and MUST NOT be used as the sole basis for any medical decision. All clinical interpretation requires a qualified clinician.
What it is
OcuTrace uses a standard laptop webcam to track iris movements in real time and measure how quickly and accurately a person can control their eye movements. It implements the gap antisaccade paradigm — a well-established research protocol for oculomotor control — focused on Parkinson's Disease as a research target.
Because it uses a ~30fps consumer webcam (not a 1000Hz clinical eye tracker), latency measurements have a temporal resolution of about ±33 ms. This is suitable for group-level research but coarser than clinical reference values; reports always include this uncertainty.
Antisaccade trials (40)
A red fixation dot appears, then a target dot on one side. The participant must look at the opposite side — suppressing the automatic urge to look toward it. This tests inhibitory control.
Prosaccade trials (20)
A green fixation dot appears, then a target dot on one side. The participant simply looks toward it. This measures basic saccade reaction speed as a baseline.
What it measures
Elevated antisaccade error rates and increased latencies are associated with frontal-lobe dysfunction, common in Parkinson's Disease and other neurodegenerative conditions.
| Metric | What it means | Normal range |
|---|---|---|
| Antisaccade error rate | % of trials where the participant looked toward the stimulus instead of away | < 20% in healthy adults |
| Saccade latency | Time from stimulus onset to the first eye movement | 150–400 ms |
| Antisaccade latency | Typically longer than prosaccade latency | 200–400 ms |
| Prosaccade latency | Baseline saccade reaction time | 150–250 ms |
Screenshots

How it works
A standard webcam feed is turned into clinical metrics through a fully local pipeline — no cloud, no patient names (sessions use UUIDs).
Iris centers are detected with MediaPipe FaceLandmarker, mapped from pixels to degrees of visual angle by a 9-point calibration, then saccades are found with a velocity-threshold algorithm (with a displacement-based fallback). Latency is the saccade onset minus the frame-accurate stimulus onset. All raw iris coordinates are stored in a local SQLite database alongside the computed metrics.
Installation
Requirements
- Python 3.10 (PsychoPy is not compatible with 3.12+)
- A webcam (built-in laptop camera works)
- Windows 10/11 or macOS (Linux support planned)
# 1. Clone the repository
git clone https://github.com/barisozyurt/OcuTrace.git
cd OcuTrace

# 2. Create a virtual environment with Python 3.10
python -m venv .venv
.\.venv\Scripts\Activate.ps1
# If you hit an execution-policy error, run once:
# Set-ExecutionPolicy -ExecutionPolicy RemoteSigned -Scope CurrentUser

# 3. Install dependencies (5-10 minutes)
pip install --upgrade pip setuptools wheel
pip install -r requirements.txt

# 4. Download the MediaPipe model (one-time, ~4 MB)
New-Item -ItemType Directory -Force models | Out-Null
Invoke-WebRequest -Uri "https://storage.googleapis.com/mediapipe-models/face_landmarker/face_landmarker/float16/1/face_landmarker.task" -OutFile "models/face_landmarker.task"

# 5. Launch OcuTrace
python main.py# 1. Install Python 3.10 via Homebrew
brew install python@3.10
# 2. Clone the repository
git clone https://github.com/barisozyurt/OcuTrace.git
cd OcuTrace
# 3. Create and activate a virtual environment
python3.10 -m venv .venv
source .venv/bin/activate
# 4. Install dependencies
pip install --upgrade pip setuptools wheel
pip install -r requirements.txt
# 5. Download the MediaPipe model
mkdir -p models
curl -L -o models/face_landmarker.task "https://storage.googleapis.com/mediapipe-models/face_landmarker/face_landmarker/float16/1/face_landmarker.task"
# 6. Launch OcuTrace
python main.pymacOS: grant camera access to Terminal/Python when prompted (System Settings → Privacy & Security → Camera). PsychoPy fullscreen may require accessibility permissions on macOS Sonoma+.
How to use it
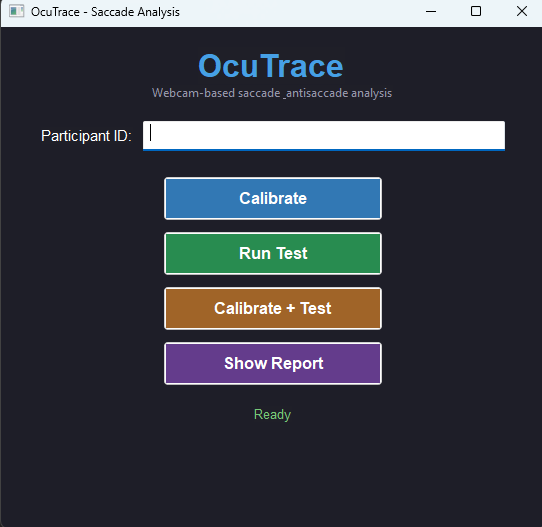
Option 1 — GUI launcher
The simplest way: run the launcher and use the buttons.
python main.py- Enter the participant name / ID
- Click Calibrate to run the 9-point calibration
- Click Run Test to run the 60-trial experiment
- Click Show Report to generate and view the report
Or use Calibrate + Test to do both in one step. Press ESC any time to abort (partial results are saved).
Option 2 — command line
# Calibrate + run the test in one step
python scripts/run_session.py --participant "Participant Name" --calibrate

# Run the test only (uses existing calibration)
python scripts/run_session.py --participant "Participant Name"

# Analyze the most recent session and build a report
python scripts/analyze.py --latest

# Launch the web dashboard (http://127.0.0.1:5000)
python scripts/dashboard.py
Reports are saved as PNG files under ~/Documents/OcuTrace/reports/. The dashboard shows all sessions with latency plots, error-rate charts and trial-by-trial detail.
Support & contact
Report a bug or request a feature
Open an issue on GitHub — this is the fastest way to get help.
Clinical collaboration
Developed in collaboration with Dr. Mert Demirel (Neurologist).
License & citation
Released under GPL-3.0. If you use OcuTrace in academic work, please cite it via CITATION.cff in the repository.